My take on “RPG Core Combat Creator” – additional modifications
In my previous post I described the way I implemented physical combat in my game based on RPG Core Combat Creator course. In this entry I would like to provide some details on additional modifications I made to the game.
Modifications to health and stamina system – vitality and rest
The original game featured a standard Health+Stamina system. I extended it with another resource called Vitality. This resource functions as a pool of points from which the player regenerates lost Health and Stamina while resting. I also implemented a rest animation to support this functionality. Below you can see the Vitality system as it presents itself in the inspector. The code is on my Github.
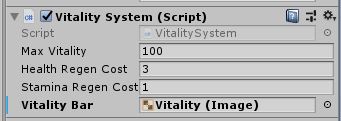
Health and Stamina may regenerate at different rates. Both rates may be customized in the inspector. When a player is not in combat and presses the X button, the character will go into a sitting stance. The sitting animation has two events attached: RegenerateHealth() and RegenerateStamina(). Each of these events is called 3 times on the animation’s timeline. This way, during each animation playback the character will have 3 regeneration ticks of health and 3 regeneration ticks of stamina.
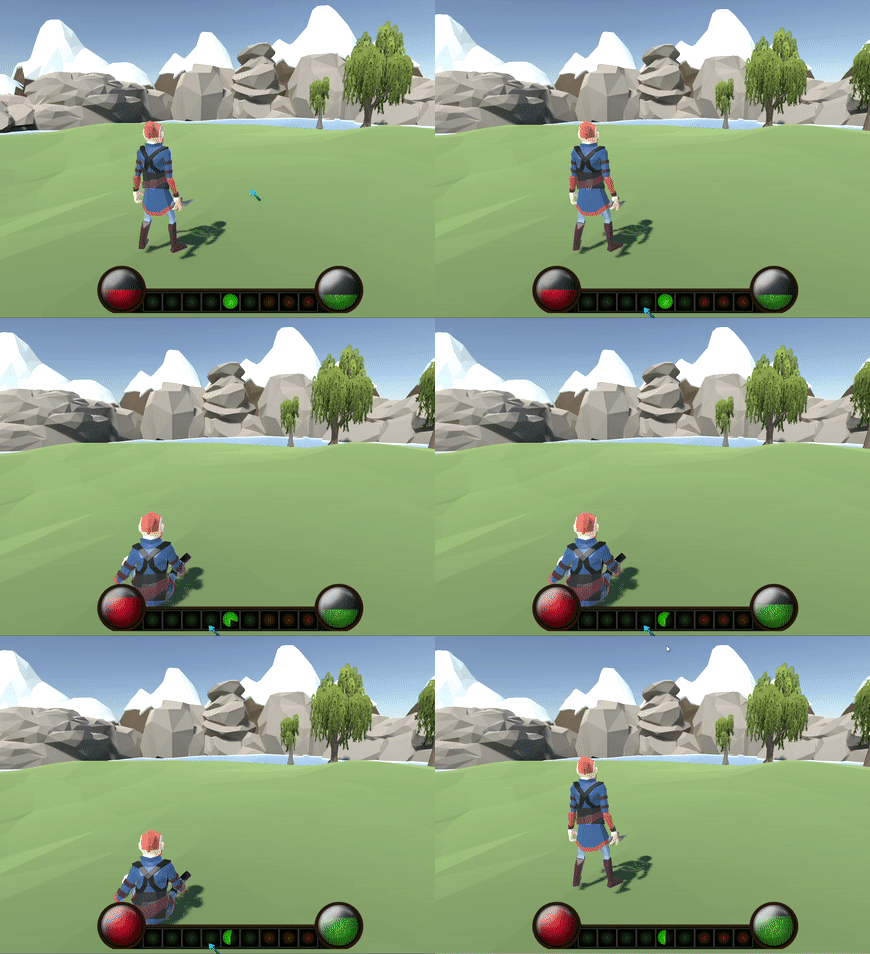
Once all stamina is spent the attacks become slower and dodging uses altered, less efficient animations.
Armor system
To provide some basics for my additional modifications to the combat system I created a totally new armor system. It is a very basic system that currently supports two features: damage mitigation and hit reaction sounds. It could be easily adapted to provide alterations to the character model based on the selected armor type. The code for the system is available here. The system provides the following data in the Inspector window:
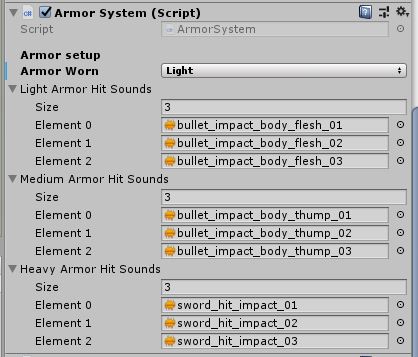
The designer may choose an armor type of any character (or the game may change it via code). Armor type will affect damage calculation. In addition, armor types determine the hit effect sounds. The screenshot above shows different sound sets assigned to each armor type. The game chooses 1 of the provided sounds randomly each time a character is hit.
“Under the hood” the armor system is also responsible for providing the combat system with important information. It specifies how much damage is mitigated after each hit. The system also checks whether a hit is a “glancing hit”. Glancing hits always deal 1 point of damage. Amount of damage mitigation and chance for receiving a glancing hit increases with the quality of armor class. The downside of heavier armor is increased stamina cost of each action.
Combat calculation modifications
The first and most profound change to the original combat system was the refactoring. I basically rewrote the whole system to only use integer values. My goal was to simply experiment with small numbers and how they interact. This of course meant that I needed to introduce additional modifications to many, if not most, of the game’s original scripts. The final damage calculations are performed by the HealthSystem class in the following way:
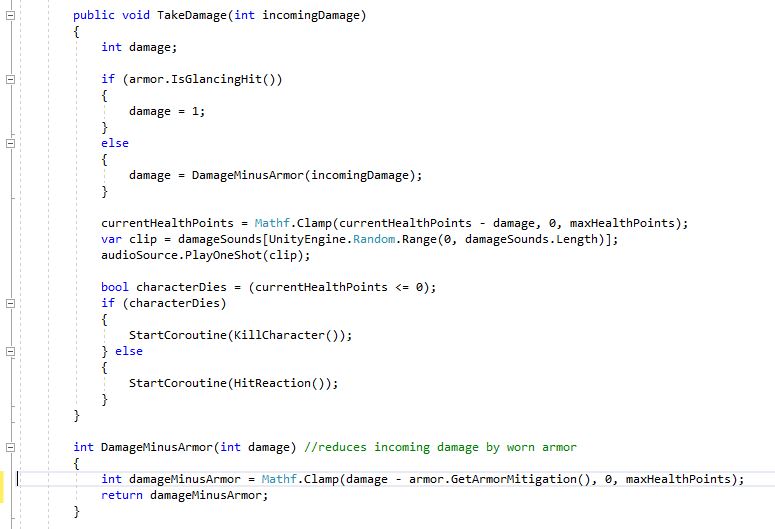
The system first determines whether the hit is a glancing hit. If not, it pulls the DamageToDeal value from the attacker’s weapon system. The calculation of this value works in the following way:

The attacker’s weapons system is responsible for the final damage value. Critical hit chances and damage bonuses are based on two sources: the attacker’s innate stats and weapon’s stats. The defender’s HealthSystem first filters the final damage value through its ArmorSystem. Then it uses the result to reduce the defender’s health pool.
Combos
One of the things I always wanted to try was attack combinations or “combos”. The implementation, to my surprise, was much easier than I expected. The only thing that was required was a set of animations arranged in a sequence. This is the way I arranged the animations in the Unity editor:
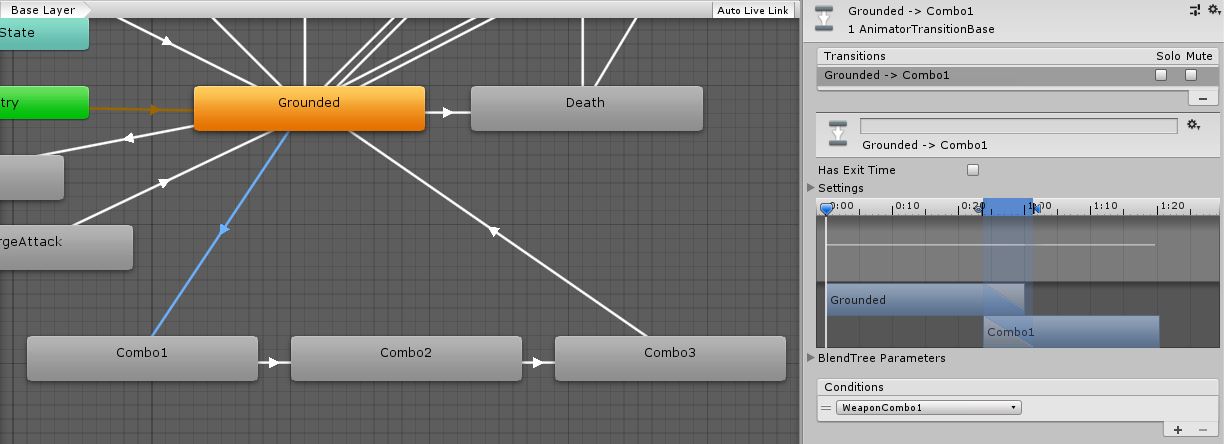
This is a very simple animation sequence activated by a Shift+RMB combination from the Grounded state. The player cannot exit the sequence once it is started, but the sequence is much faster than a series of 3 regular attacks. I can see lots of potential in this solution. Transitions between states could be based on conditions. For example, a combo could consist of 5 attacks, but attacks 4 and 5 would have to be unlocked. Without proper “talents”, the animation controller would simply transition back to the Grounded state after the third attack is completed.
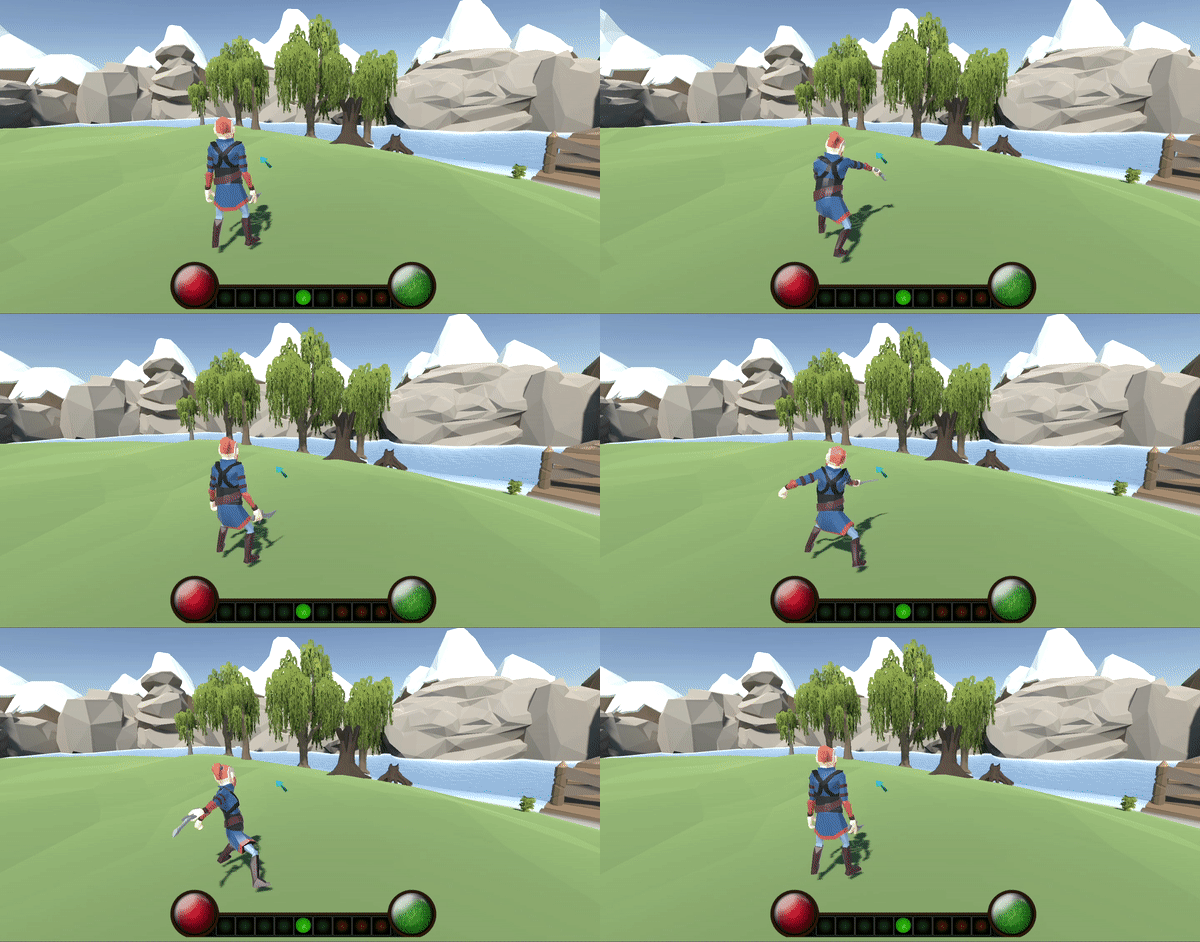
Two standard hit animations followed by two combo animations.
Scene interactions
The last set of modifications I wanted to include in this demo was some degree of destructibility. I already had lots of fun with destructible, physically based environments in my first game demo. Here I simply wanted to have a general script that would enable destruction of objects. The way it works is you attach the DestructibleItem script to an object you want to make destructible. The following fields will appear when you select the object in the inspector:
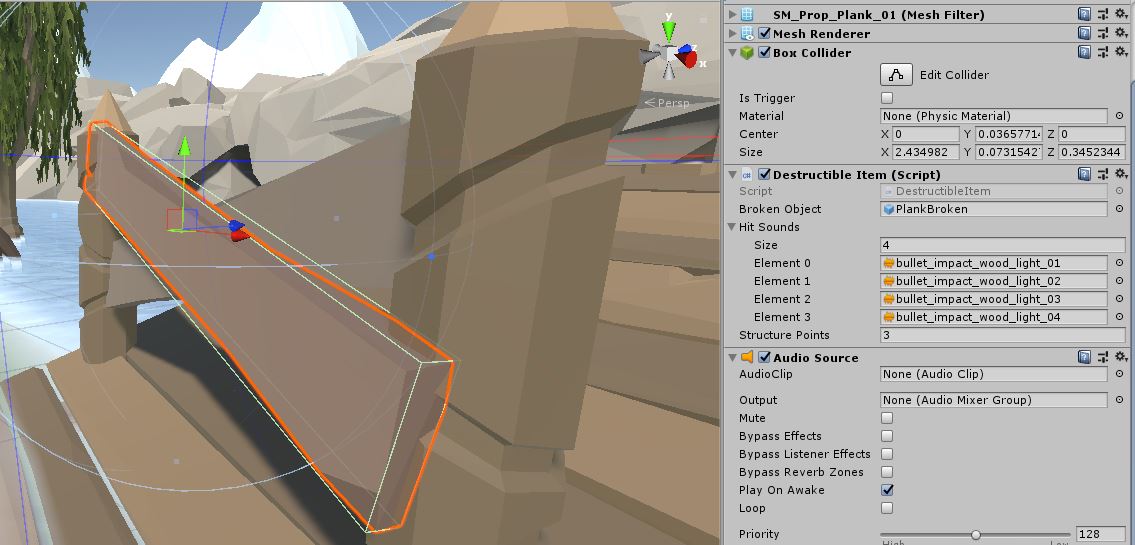
To make this destructible system work you need to prepare a prefab which consists of parts the object will be broken into. This prefab should then be put into the Broken Object field. For the plank in the screenshot above I created two parts of a broken plank that both have colliders and rigidbodies. This way the two smaller parts of the destroyed plank fall to the ground in a realistic way.
The next field is the Hit Sounds array which stores sounds that the object produces when hit. The last field called Structure Points determines how many times someone has to hit the object before it is destroyed. I also created a helper script called DestructibleItemPart which is responsible for managing the responsiveness of parts after destruction. The script makes sure there is an audio source on such objects and allows for specifying sounds these items make on collision. Both scripts are available on my Github and are easily adaptable to any project, or at least I hope they are;).
Summary
I began working on this project in spring of 2017 and finished the course material in summer of the same year, just as the tutors uploaded the final lessons. My own modifications were created in autumn of 2017/early 2018, and then I moved on to other courses.
The main reason for going back to this course now, after such a long time, was an inner feeling of lack of closure. I invested quite a lot of mental energy and learned a lot during this course. Despite that, I also felt that if I did not record any gameplay nor document any of my work. And I remember that Rick and Ben always said to show your work to other people. This is my main reason for this write-up. I was also afraid that with ever evolving Unity Engine my game would soon be unusable without major modifications. I have uploaded the gameplay of the final version of the demo on my YouTube channel:
I used some paid art assets when making my game. I bought most of these assets during sales or as bundles. Humble Bundle sometimes offers bundles dedicated to game developers in general and Unity developers in particular. List of asset developers:
- 3D art by Synty Studios
- Skies and terrains by Procedural Worlds
- Enviro Sky and Weather
- Aura 2 volumetric lightning
- Prefab brush


Hello Kita Pawel,
Thank you for taking the time in creating this post and talking about the RPG Combat Creator Course. We are very grateful for the kind words! Awesome job with your project! Ben and Rick are correct and awesome job for sharing this! Can we showcase your work? Also if you need anything let us know.
Warm Regards,
Kevin-Brandon Corbett and the GameDev.tv Team.
Hi Kevin,
Thanks for the comment and sorry for the late reply. I have been working on my new project (which I will showcase soon) and got a little to immersed in it;)
As far as showcasing my work, please go ahead. If you need anything, please contact me.
Best regards,
Paweł Kita
Good web site! I truly love how it is easy on my eyes and the data are well written. I am wondering how I could be notified whenever a new post has been made. I’ve subscribed to your RSS which must do the trick! Have a nice day!