Tile tools in Pyxel Edit
Pyxel Edit is my favourite tool for creating 2D tiles, and is often quoted as the best solution for the job. In this tutorial I will briefly present the tile tools in Pyxel Edit and explain basic issues a new user might have.
Basics of tile tools in Pyxel Edit
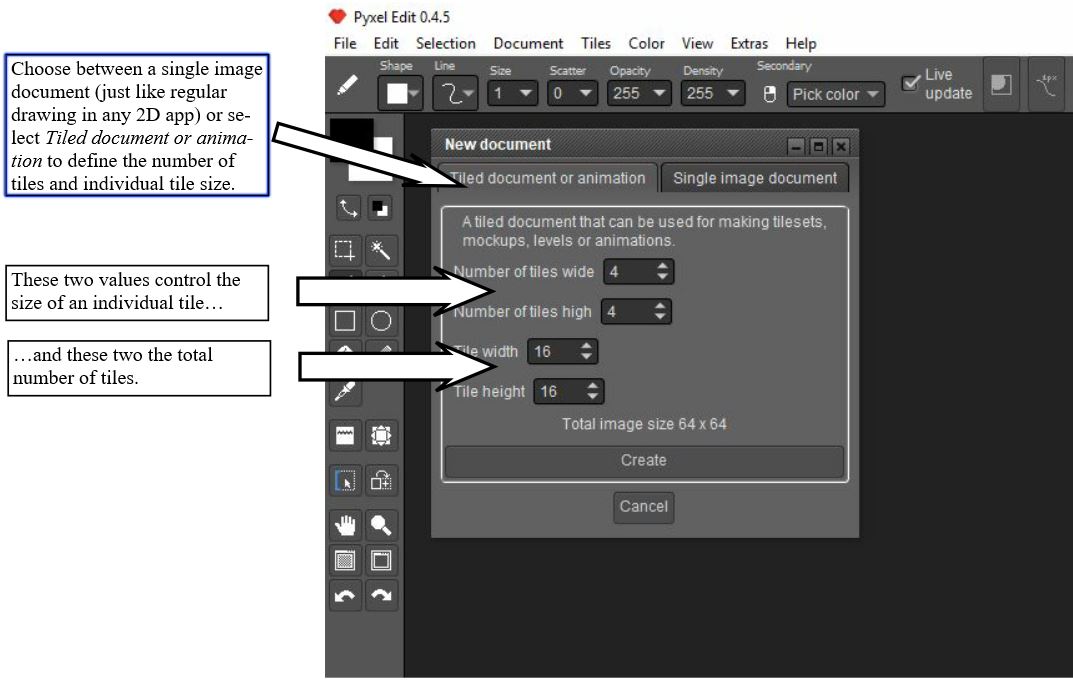
1. First create a new project by using File > New. A new dialog will appear. It allows for the creation of a single image, just like in a regular painting application. Additionally, it provides an option for creating a multiple tile image. This multiple tile image is ideal for creating tilesets or animations. Choose the required setting and press Create.
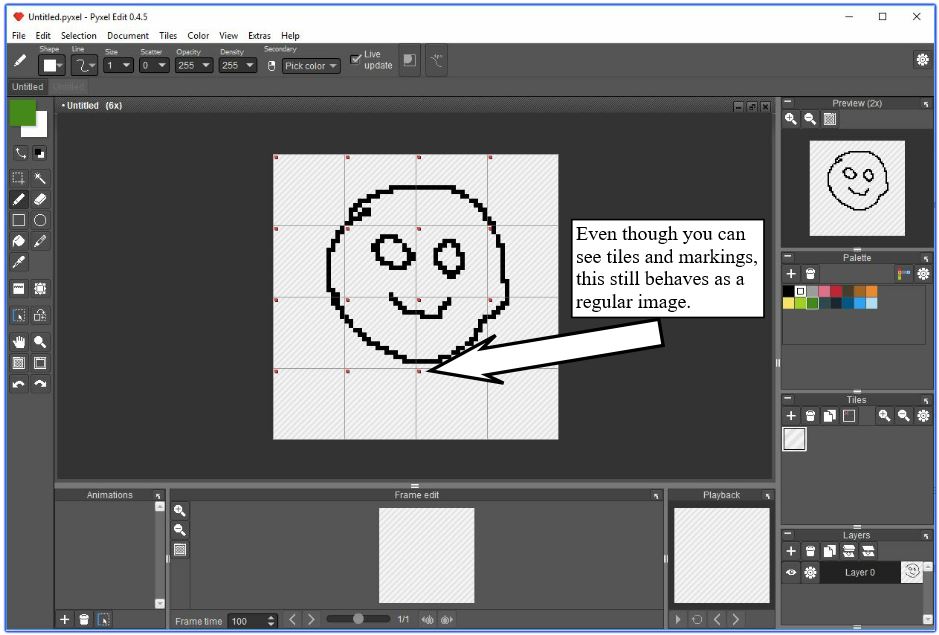
2. The image will appear in the center of the screen. It will be divided into rectangular areas. However, it will still function as a regular image. If you use the Pen tool, you will draw over the whole image. To turn on the tile editing mode go to View in the top menu and select Show tile indices. This will show the index (number) of each tile. Initially no tiles have indices.
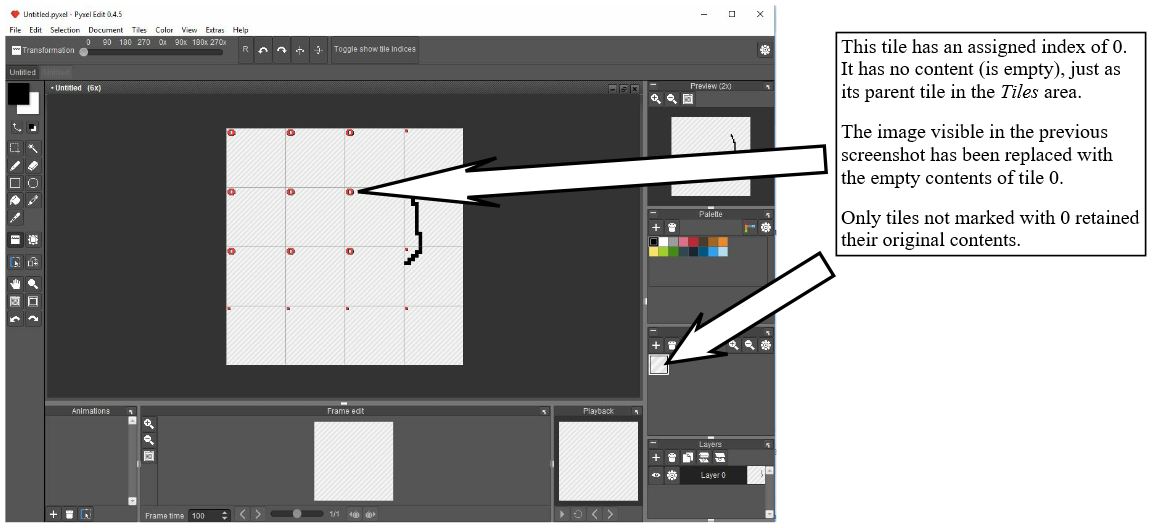
3. Tiles are stored in the Tiles pane to the right of the canvas. The first tile with an index of 0 is already available in the pane. To define a new tile, click the + sign above the initial tile. These tiles act as containers for data and you can paint with them and modify them on the canvas. If you look closely at tile 0, you will see it contains no data. Select it and start clicking on the canvas. If the canvas contained any drawings, these drawings will be replaced with the selected tile’s content. In this case, the tile is empty, so it would act as an eraser.
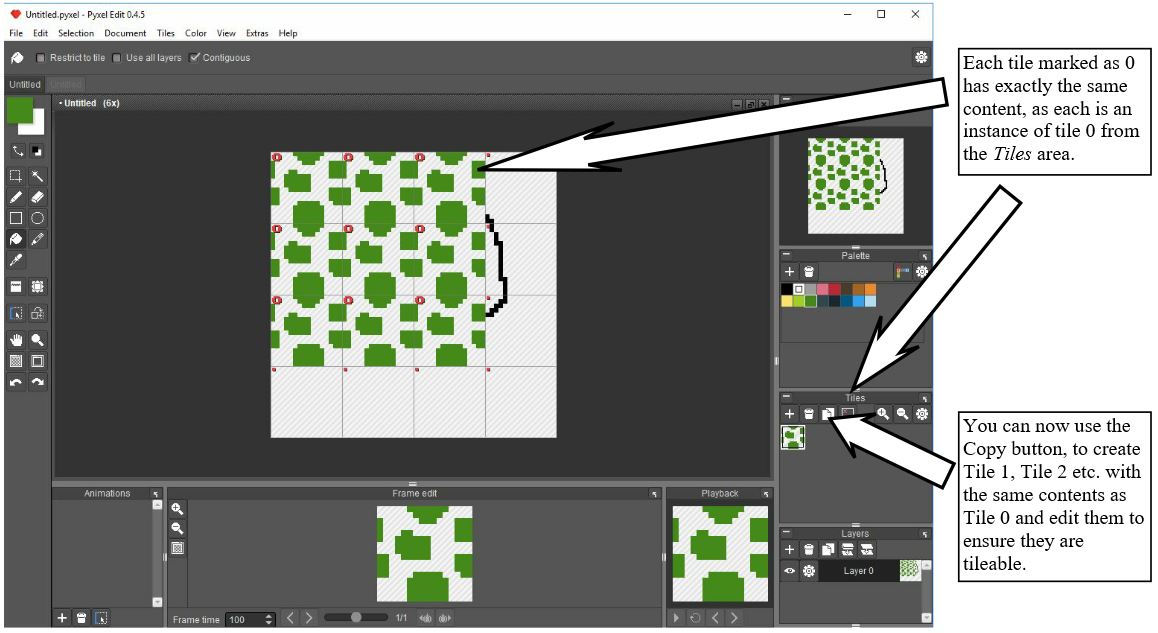
4. The canvas is now marked with the selected tile’s index numbers. We can draw on any tile marked with 0, and all other tiles marked as 0 will update accordingly. This happens because these are the instances of tile 0 stored in the Tiles pane. If you look at the Tiles pane you will notice that the base tile always reflects what is visible on the canvas.
5. Now use the Select clear tile button in the Tiles pane to remove the tile indices from the canvas. This will clear tile indices and tile contents from the canvas. However, the base tile in the Tiles pane will remain unchanged. It will be available for future use. You can then duplicate the tile, place it on the canvas and modify the duplicated tile. Repeat the process until you have the whole tileset ready.
Most important things to remember
- The tiles on the canvas are instances of the tile parent object from the Tiles pane.
- When you place tile instances on the canvas, you can modify the base tile by modifying the instances.
- When working on one instance, you modify all instances in the same way. Therefore all instances are the same.
- You can rotate tile instances using transformation options below the top menu of Pyxel Edit.
This is just the basic introduction to this robust system. For new users working with multiple tiles may be confusing at first. It is easy to overwrite existing work and loose your tiles when you click it with another tile. In another tutorial I will go step by step through my workflow of creating tiles in Pyxel Edit. I will show how I avoid some confusion this system may sometimes cause.
References
Pyxel Edit official tutorials: https://pyxeledit.com/learn.php


Recent Comments