
Import 2D tiles into Unity
Development of 2D games is one of the first things people attempt when they launch Unity. However, it is not enough to properly import 2D tiles into Unity. We also need to perform a specific set of actions to configure the image. By default Unity does not know how to treat the imported file.
You can download the following asset pack. It contains a walls_final.png image which I have used in this tutorial.
What are 2D tiles?
Tiles are sprites used to build 2D environments and backgrounds in games. It is customary to build tileable sprites that may be reused multiple times in different configurations to speed up level design processes. The idea behind tile based design is the reusability of just a few different images to create whole levels with enough uniqueness, so that the levels do not feel overly artificial. The opposite of tile-mapping is drawing manually or generating the scenes. Popular games that use tiles for level creation are Terraria and Spelunky.
In two other posts I have described the process of creating 2D tiles in Aseprite and PyxelEdit. Below I will describe how to import and configure these tiles in Unity.
Importing tiles
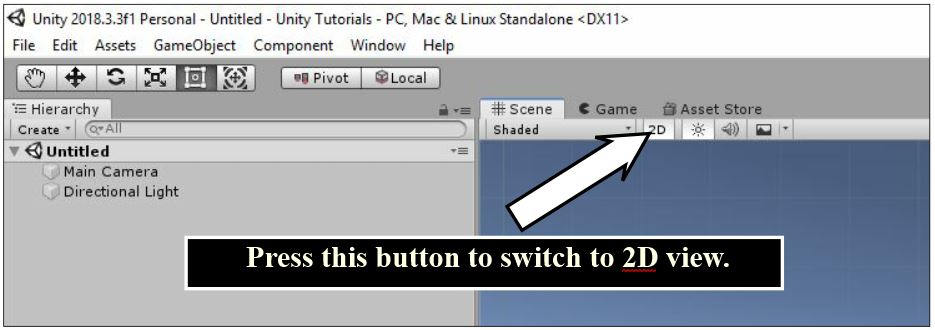
1. To comfortably work with 2D tiles (or any 2D assets) in Unity, set your editor view to 2D mode.
2. From the top menu select Assets > Import New Asset… and browse to the location of an image file. Alternatively, just drag and drop the chosen image file from its directory into the Assets area in the Unity editor.
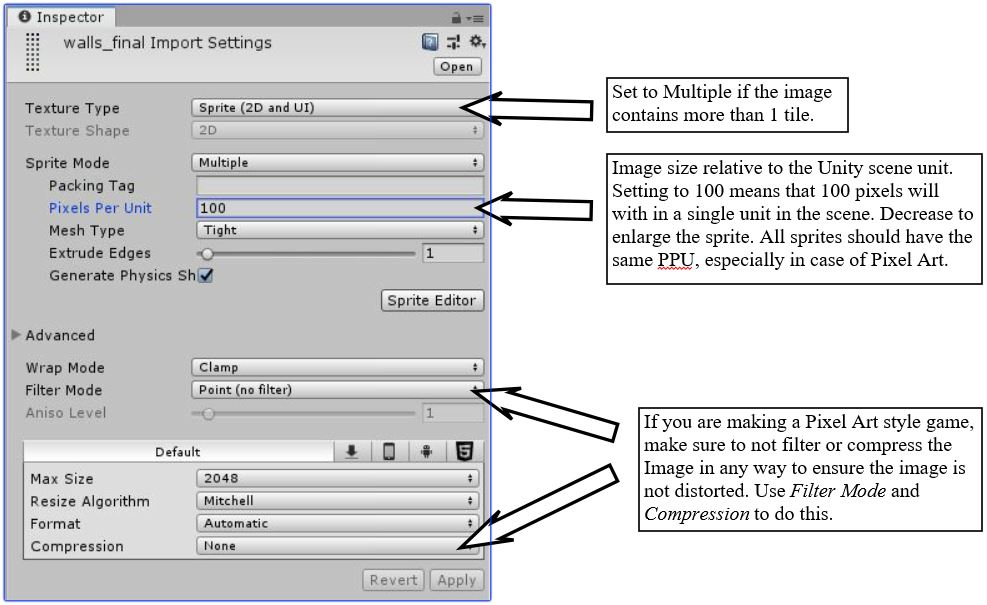
3. The file will appear in the Assets area of the editor, but it will not be usable. We need to configure it for use as a sprite. To do this, select the image and set proper values in the Inspector as on the screenshot below, and click Apply.
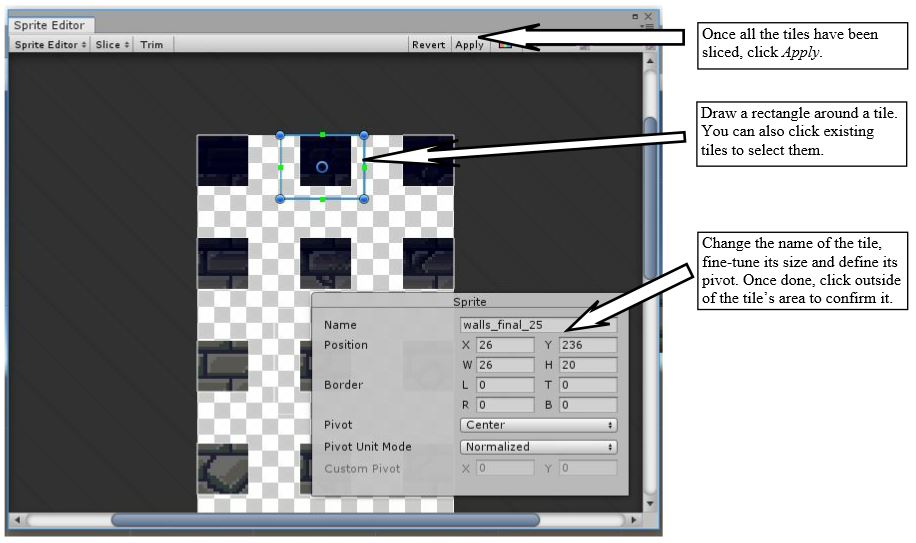
4. The image thumbnail will change, however we still need to “slice” the Image into individual pieces, if more than one sprite is present. To do this, click the Sprite Editor button in the Inspector for the chosen image.
5. There are two ways to slice the tilesheet.
5a. Manual: Drag a rectangle around a chosen sprite with a mouse. Once you create a desired shape, a popup window with settings will open. After setting all the values, click outside of the created rectangle. A new tile will be created.
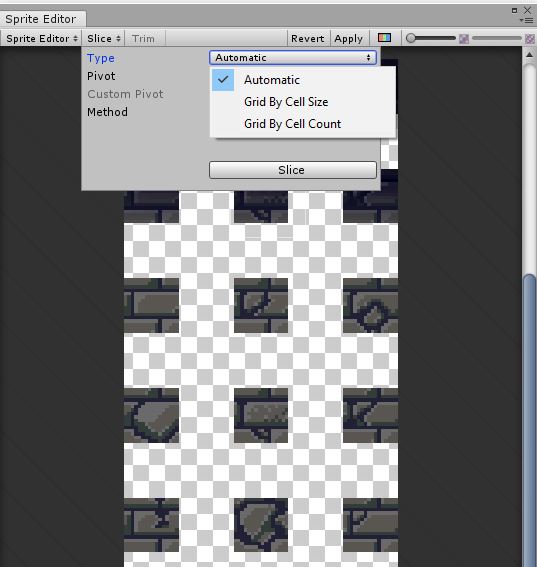
5b. Automatic: Select one of the automatic modes shown in the screenshot below. For our purposes, the Automatic mode will be sufficient. Then press the Slice button. The Sprite Editor will create the sprites automatically, based on the image provided.
6. After slicing the sprites press the Apply button.
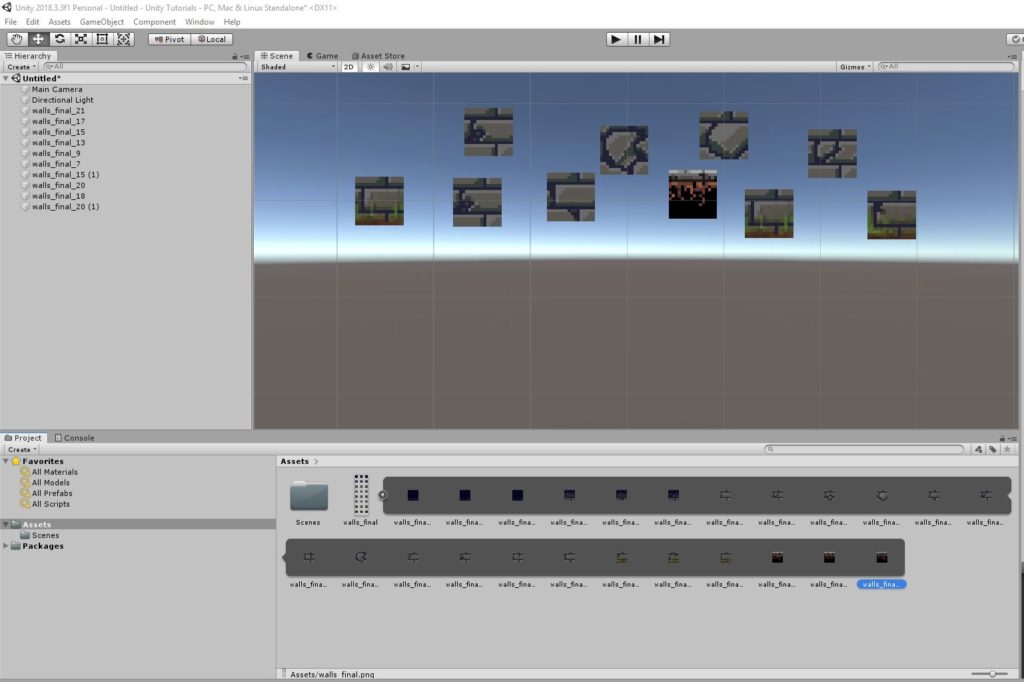
7. An arrow at the right side of the image in the Assets view may be clicked. All the tiles created by slicing will now appear in the view. Now you can drag and drop tiles into the scene.
References:
Unity documentation: https://docs.unity3d.com/Manual/Sprites.html
Tiles on wikipedia: https://en.wikipedia.org/wiki/Tile-based_video_game


Recent Comments